Round 5: vs John Helbig
Scenario: Invasion
Going into the final round of this scrum, I had returned the seven slayers I borrowed to run the Lich3 list. I knew that meant I was dropping Venethrax no matter what I saw. Here are the lists:
Me:
[Asphyxious 3] Asphyxious the Hellbringer [+24] - Black Industries
- Nightwretch [0(7)]
- Nightwretch [0(7)]
- Ripjaw [0(7)]
- Slayer [10]
- Slayer [10]
- Slayer [10]
- Slayer [10]
- Slayer [10]
- Slayer [10]
- Slayer [10]
- Slayer [10]
- Slayer [10]
Machine Wraith [2]
Soul Trapper [1]
Black Ogrun Ironmongers [6]
[Venethrax 1] Lich Lord Venethrax [+26] - Slaughter Fleet Raiders
- Deathripper [6]
- Kharybdis [17]
- Scavenger [7]
- Scavenger [7]
- Satyxis Blood Priestess [4]
Axiara Wraithblade [0(6)]
General Gerlak Slaughterborn [0(6)]
Misery Cage [2]
Misery Cage [2]
Ragman [4]
Black Ogrun Smog Belchers (max) [15]
Blighted Trollkin Marauders (min) [9]
Bloodgorgers (max) [15]
- Jussika Bloodtongue [5]
The Devil's Shadow Mutineers [8]
John:
[Zerkova 1] Koldun Kommander Aleksandra Zerkova [+28] - Wolves of Winter
- Destroyer [14]
- Juggernaut [13]
- War Dog [3]
Fenris [9]
Greylord Forge Seer [0(4)]
- Destroyer [14]
Koldun Lord [0(4)]
Battle Mechaniks (min) [3]
Doom Reaver Swordsmen [13]
- Greylord Escort [3]
Doom Reaver Swordsmen [13]
- Greylord Escort [3]
Greylord Ternion [7]
Greylord Ternion [7]
Looking at John's list, I felt like nine slayers would have been the way to go. If I was competing for a higher position I might have tried to see if I could borrow them again, but at this point I decided that I wanted to see what Venethrax could do. I had misread at least one matchup in the scrum, maybe this would be a similar situation. I won the die roll and chose to go first.
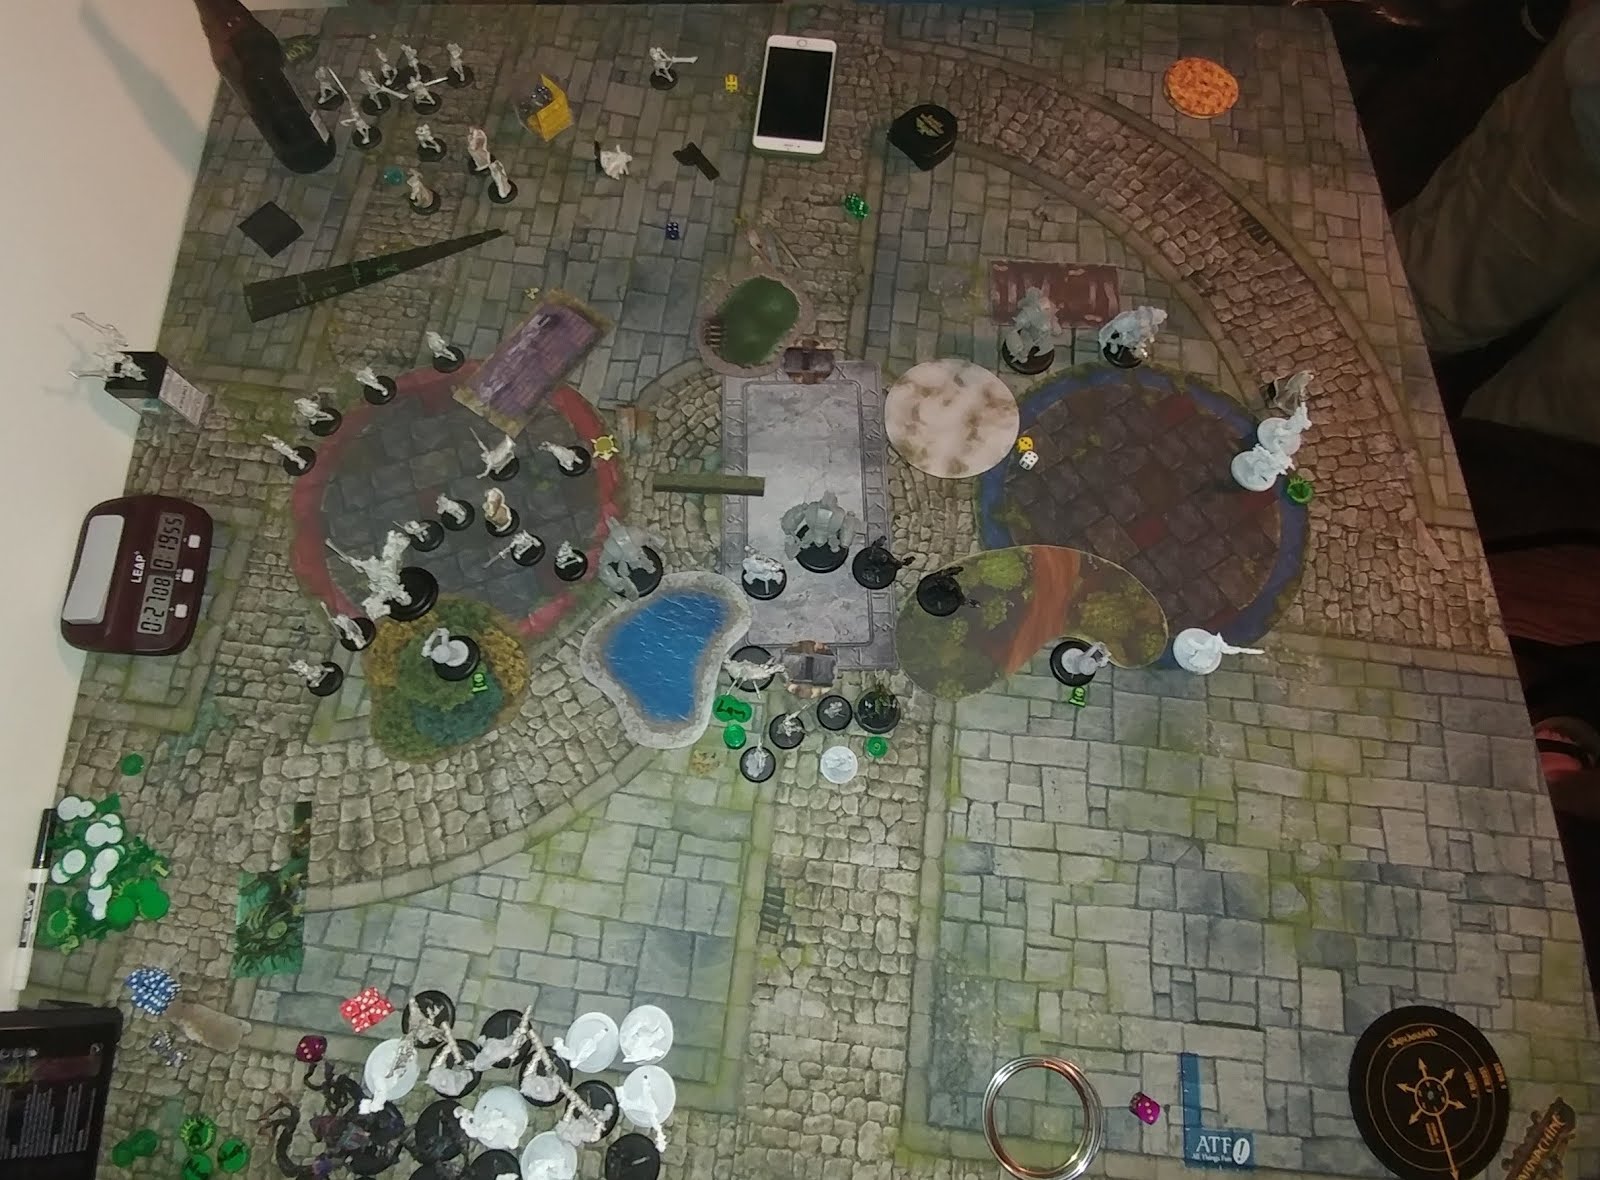
Deployment: Sadly, I forgot to take a picture of our deployment. I deployed my bloodgorgers to the far right with Gerlack to their left and the marauders to the left of Gerlack. Next came a scavenger and then Venethrax. Venethrax was surrounded by Ragman, Axiara and the Devil's Shadow with the blood priestess behind. The arc node and other scavenger was to the left of this cluster with the smog belchers to the left, hoping to move between the forest and water. Finally, Kharybdis sat out on the far left flank.
John deployed a unit of ternion on each flank. The forge seer and the destroyer it was marshalling was to the left of the far right ternion unit along with the koldun lord. To the left of that was the juggernaut, Zerkova, the war dog and the other destroyer. Fenris was to the right of the left unit of ternion along with the mechaniks.
During my advance deployment, I placed one misery cage behind the zone on the right just inside the zone. The other cage was inside the left forest, also just inside the zone.
John's advance deployment had him put a unit of doom reavers on either flank.
Top 1: Venethrax casts lamentation and walks forward. The smog belchers run forward, lining three members of the unit up to walk between the forest and water. A fourth stands behind the water and the leader walks into the water. A scavenger runs inside the left forest, along with Kharybdis. The jacks are on either side of the misery cage in the forest. The marauders run forward, with one of them toeing into the right forest. The Devil's Shadow, Ragman and Axiara surround Venethrax, with the blood priestess standing behind. The arc node runs to stand behind the water. Gerlack runs to stand directly behind the right forest and the bloodgorgers run to get around the right side of the right forest. The second scavenger runs to stand to the right of the right misery cage. The turn ends with 53 minutes on my clock.

Bottom 1: John apparitions the left unit of doom reavers forward and around the house. One is able to get charge distance on the forward most smog belcher and another runs to engage Kharybdis. The rest stay back near the house. The doom reaver charging the smog belcher misses his attack. Fenris moves forward to stand behind the left unit of doom reavers and the left ternion unit arranges to the left of him. The mechaniks move up to behind the house. The right doom reavers position just outside the charge range of the blood gorgers with the ternion unit spread out behind. The three jacks move forward and spread out in the center. Zerkova moves to the left and puts up three clouds to protect the left doom reaver unit and the war dog moves to stand near her. John's turn ends with 51 minutes on the clock.

Top 2: John didn't leave me many targets to come in on. The clouds are protecting his left doom reavers, and that's what I really wanted to be shooting with the smog belchers this turn. I plan to use the scavenger to free up Kharybdis and then have it move back to keep it safe from charging doom reavers. The scavenger activates and fails to kill the doom reaver in front of Kharybdis. Kharybdis activates and kills the doom reaver in front of it along with the reaver engaging the forward most smog belcher. I completely forgot the part of the plan where it needed to move back to stay safe. Axiara activates and gives the smog belchers reposition. The smog belchers move forward and take some shots. The shots all drift around, but don't actually hit anything. They drop their cloud wall and reposition behind it.
The marauders run to get around and mostly through the forest. I know I am out threatened on the right, so I run the blood gorgers forward hoping enough will survive the alpha that I can take out most of the infantry over there next turn. Three members of the unit are placed much farther ahead of the rest to try and stop doom reavers from getting deep and beserking through too much of the unit. Venethrax stays centrally positioned with the blood priestess behind. The Devil's Shadow, Ragman and the arc node all run to be in front of Venethrax and Gerlack continues to stand behind the right forest. The end result of my "alpha" was two dead doom reavers. My turn ended with 43 minutes on the clock.

Bottom 2: The doom reavers on the left apparition again and then charge in on the left scavenger and Kharybdis. The scavenger dies and Kharybdis takes a decent amount of damage. Fenris charges Kharybdis and leaves it on about 4 boxes. One arm and movement are still functional. The left ternion and mechaniks advance to stand next to the house. The left destroyer ran to stand in the middle of three smog belchers. The other destroyer shot the rightmost smog belcher, who succeeded in his tough check. The blast damage killed Zira from the Devil's Shadow (the weapon master guns with eyeless sight one) and two marauders. Zerkova cast watcher on herself, moved forward and feated.
The ternion unit on the right moved up through the doom reavers to cast their sprays, hoping to kill some blood gorgers and free up the doom reavers. Due to some poor dice rolls and a crazy number of tough checks, the ternion unit only killed a single blood gorger with their three sprays. The doom reavers charged in and at the end of their activation, five bloodgorgers were dead. Two more marauders also died to doom reaver charges. The forge seer continued to stand in the trench. Turn 2 ended without any control points getting scored and John had 33 minutes on his clock.

Top 3: At this point, I was almost starting to think that clock might be my best path to victory. With two of my three jacks neutralized, I wasn't sure how I would deal with the heavies on the other side of the table. The blood gorgers took their vengeance movement and attacks, killing a couple doom reavers. Venethrax upkept lamentation for free and put a focus on the scavenger. The scavenger failed to kill the doom reaver engaging two of the blood gorgers. The blood gorgers received the press forward order and used beserk and overtake to kill all the doom reavers and ternion on that side. All that was left was the two doom reavers that took on the marauders and the koldun lord.
The Devil's Shadow moved back to allow Mar a shot at one of the doom reavers on the right. She rolled an unlikely nine to hit, but promptly failed to crack armor, spoiling my plan to bring Zira back to life. The remaining marauders moved forward and used ranged attacks on the two doom reavers, killing one and setting the other on fire. Kharybdis flailed ineffectively at the doom reavers around it. The three smog belchers engaged by the jack attacked it, but didn't do much damage. The other two took shots at the war dog, with one landing the shot. This failed to kill the war dog, but caught both the dog and Zerkova in the AOE, preventing them from charging or running for a round. Venethrax stood next to the objective and popped feat, catching all three warjacks. The turn ended with no scoring and 27 minutes on my clock.

Bottom 3: Zerkova upkept watcher. The forge seer killed the blood gorger engaging the koldun lord, who moved over and sprayed over four blood gorgers, killing two of them. The destroyer shot a bloodgorger killing it, the scavenger and another bloodgorger with the blast damage. The juggernaut charged Morland from the Devil's Shadow and killed him. The doomreavers did some damage to Kharybdis, but he remained alive. They also managed a charge on a smog belcher and killed it. Fenris finished off Kharybdis, but somehow failed to kill the misery cage. The ternion on the left moved forward and sprayed, but also failed to kill the misery cage. Zerkova moved forward and took a shot, but also failed to kill it. The mechaniks spread out across the back of the left zone. The jack that was engaging the three smog belchers killed them, leaving only one of the unit alive. The war dog ran to stand next to Zerkova. Due to the immortal misery cage in the left zone, no scoring happened again. John's turn ended with 19 minutes on his clock.

Top 4: At this point I knew I was in a bad place. Venethrax was the only thing I had that could realistically deal with the jacks, so that was the plan. Ragman put up his death field and then Venethrax charged the jack in the middle zone. He cast mortality on it and ended up sitting on only a single focus when he finished his attacks. Axiara charged and killed the jack. Jussika and the last blood gorger charged the forge seer and the jack. Neither died. Gerlack charged in and killed the koldun lord, then beserked into the blood gorger, killing it. The smog belcher moved to the left to take a shot and block charge lanes to Venethrax, but I forgot about counter charge on the dog. The dog promptly killed the smog belcher and then returned. The last two marauders took up positions to try and block the same charge lane, as did the arc node. Mar walked behind the water to try and shoot a doom reaver to resurrect her pals, but failed to hit. The turn ended with me scoring the right zone and my clock at 15 minutes. The score was 1-0.

Bottom 4: John decided he had an assassination angle and went for it. Lamentation prevented Zerkova from trying to cast any spells, which meant I had a sliver of a chance. If my marauders could make a tough check or two they might survive. The jack outside the right zone walked into the zone and failed to kill Gerlack. I forget the exact sequence of activations, but between ternion sprays and Fenris, the arc node, both marauders and my objective were killed, clearing the lane for the jack to get to Venethrax. One focus was not enough to survive the attack. Venethrax died with 9 minutes exactly on John's clock. He scored the left zone and scored for killing my objective, putting the final score at 1-2.

Analysis: I did not feel great about this matchup, but was hoping I had kinda misread it. Venethrax not really being able to cast spells hurts the list. Mortality is important for the list to actually hit with any power and most of his list was immune to spells. Having all my jacks was going to be super important to bringing his down, but I really misplayed their positioning, which allowed John to kill them before they got a chance to go in on his heavies. My biggest mistake was not moving Kharybdis back, as without him I didn't have the presence on the left side to fight off Fenris and the doom reavers. I feel like that was my biggest mistake.
The list is decent, but the lack of pathfinder really hurt me in this game. Navigating both forests and the water feature on my side of the board really hindered the mobility of my army though this game. That said, the only way to fix it is to drop Ragman for Saxon and Ragman's dark shroud spell is needed for the list to hit hard enough to deal with armored targets.
I'm certain there are other issues that I could identify, but I'm at work and probably should be doing work things instead of typing up a battle report. Sorry to cut this short. Next week I'm going to do a wrap up on the July scrum. Thanks for reading!
Scenario: Invasion
Going into the final round of this scrum, I had returned the seven slayers I borrowed to run the Lich3 list. I knew that meant I was dropping Venethrax no matter what I saw. Here are the lists:
Me:
[Asphyxious 3] Asphyxious the Hellbringer [+24] - Black Industries
- Nightwretch [0(7)]
- Nightwretch [0(7)]
- Ripjaw [0(7)]
- Slayer [10]
- Slayer [10]
- Slayer [10]
- Slayer [10]
- Slayer [10]
- Slayer [10]
- Slayer [10]
- Slayer [10]
- Slayer [10]
Machine Wraith [2]
Soul Trapper [1]
Black Ogrun Ironmongers [6]
[Venethrax 1] Lich Lord Venethrax [+26] - Slaughter Fleet Raiders
- Deathripper [6]
- Kharybdis [17]
- Scavenger [7]
- Scavenger [7]
- Satyxis Blood Priestess [4]
Axiara Wraithblade [0(6)]
General Gerlak Slaughterborn [0(6)]
Misery Cage [2]
Misery Cage [2]
Ragman [4]
Black Ogrun Smog Belchers (max) [15]
Blighted Trollkin Marauders (min) [9]
Bloodgorgers (max) [15]
- Jussika Bloodtongue [5]
The Devil's Shadow Mutineers [8]
John:
[Zerkova 1] Koldun Kommander Aleksandra Zerkova [+28] - Wolves of Winter
- Destroyer [14]
- Juggernaut [13]
- War Dog [3]
Fenris [9]
Greylord Forge Seer [0(4)]
- Destroyer [14]
Koldun Lord [0(4)]
Battle Mechaniks (min) [3]
Doom Reaver Swordsmen [13]
- Greylord Escort [3]
Doom Reaver Swordsmen [13]
- Greylord Escort [3]
Greylord Ternion [7]
Greylord Ternion [7]
Looking at John's list, I felt like nine slayers would have been the way to go. If I was competing for a higher position I might have tried to see if I could borrow them again, but at this point I decided that I wanted to see what Venethrax could do. I had misread at least one matchup in the scrum, maybe this would be a similar situation. I won the die roll and chose to go first.
Deployment: Sadly, I forgot to take a picture of our deployment. I deployed my bloodgorgers to the far right with Gerlack to their left and the marauders to the left of Gerlack. Next came a scavenger and then Venethrax. Venethrax was surrounded by Ragman, Axiara and the Devil's Shadow with the blood priestess behind. The arc node and other scavenger was to the left of this cluster with the smog belchers to the left, hoping to move between the forest and water. Finally, Kharybdis sat out on the far left flank.
John deployed a unit of ternion on each flank. The forge seer and the destroyer it was marshalling was to the left of the far right ternion unit along with the koldun lord. To the left of that was the juggernaut, Zerkova, the war dog and the other destroyer. Fenris was to the right of the left unit of ternion along with the mechaniks.
During my advance deployment, I placed one misery cage behind the zone on the right just inside the zone. The other cage was inside the left forest, also just inside the zone.
John's advance deployment had him put a unit of doom reavers on either flank.
Top 1: Venethrax casts lamentation and walks forward. The smog belchers run forward, lining three members of the unit up to walk between the forest and water. A fourth stands behind the water and the leader walks into the water. A scavenger runs inside the left forest, along with Kharybdis. The jacks are on either side of the misery cage in the forest. The marauders run forward, with one of them toeing into the right forest. The Devil's Shadow, Ragman and Axiara surround Venethrax, with the blood priestess standing behind. The arc node runs to stand behind the water. Gerlack runs to stand directly behind the right forest and the bloodgorgers run to get around the right side of the right forest. The second scavenger runs to stand to the right of the right misery cage. The turn ends with 53 minutes on my clock.

Bottom 1: John apparitions the left unit of doom reavers forward and around the house. One is able to get charge distance on the forward most smog belcher and another runs to engage Kharybdis. The rest stay back near the house. The doom reaver charging the smog belcher misses his attack. Fenris moves forward to stand behind the left unit of doom reavers and the left ternion unit arranges to the left of him. The mechaniks move up to behind the house. The right doom reavers position just outside the charge range of the blood gorgers with the ternion unit spread out behind. The three jacks move forward and spread out in the center. Zerkova moves to the left and puts up three clouds to protect the left doom reaver unit and the war dog moves to stand near her. John's turn ends with 51 minutes on the clock.

Top 2: John didn't leave me many targets to come in on. The clouds are protecting his left doom reavers, and that's what I really wanted to be shooting with the smog belchers this turn. I plan to use the scavenger to free up Kharybdis and then have it move back to keep it safe from charging doom reavers. The scavenger activates and fails to kill the doom reaver in front of Kharybdis. Kharybdis activates and kills the doom reaver in front of it along with the reaver engaging the forward most smog belcher. I completely forgot the part of the plan where it needed to move back to stay safe. Axiara activates and gives the smog belchers reposition. The smog belchers move forward and take some shots. The shots all drift around, but don't actually hit anything. They drop their cloud wall and reposition behind it.
The marauders run to get around and mostly through the forest. I know I am out threatened on the right, so I run the blood gorgers forward hoping enough will survive the alpha that I can take out most of the infantry over there next turn. Three members of the unit are placed much farther ahead of the rest to try and stop doom reavers from getting deep and beserking through too much of the unit. Venethrax stays centrally positioned with the blood priestess behind. The Devil's Shadow, Ragman and the arc node all run to be in front of Venethrax and Gerlack continues to stand behind the right forest. The end result of my "alpha" was two dead doom reavers. My turn ended with 43 minutes on the clock.

Bottom 2: The doom reavers on the left apparition again and then charge in on the left scavenger and Kharybdis. The scavenger dies and Kharybdis takes a decent amount of damage. Fenris charges Kharybdis and leaves it on about 4 boxes. One arm and movement are still functional. The left ternion and mechaniks advance to stand next to the house. The left destroyer ran to stand in the middle of three smog belchers. The other destroyer shot the rightmost smog belcher, who succeeded in his tough check. The blast damage killed Zira from the Devil's Shadow (the weapon master guns with eyeless sight one) and two marauders. Zerkova cast watcher on herself, moved forward and feated.
The ternion unit on the right moved up through the doom reavers to cast their sprays, hoping to kill some blood gorgers and free up the doom reavers. Due to some poor dice rolls and a crazy number of tough checks, the ternion unit only killed a single blood gorger with their three sprays. The doom reavers charged in and at the end of their activation, five bloodgorgers were dead. Two more marauders also died to doom reaver charges. The forge seer continued to stand in the trench. Turn 2 ended without any control points getting scored and John had 33 minutes on his clock.

Top 3: At this point, I was almost starting to think that clock might be my best path to victory. With two of my three jacks neutralized, I wasn't sure how I would deal with the heavies on the other side of the table. The blood gorgers took their vengeance movement and attacks, killing a couple doom reavers. Venethrax upkept lamentation for free and put a focus on the scavenger. The scavenger failed to kill the doom reaver engaging two of the blood gorgers. The blood gorgers received the press forward order and used beserk and overtake to kill all the doom reavers and ternion on that side. All that was left was the two doom reavers that took on the marauders and the koldun lord.
The Devil's Shadow moved back to allow Mar a shot at one of the doom reavers on the right. She rolled an unlikely nine to hit, but promptly failed to crack armor, spoiling my plan to bring Zira back to life. The remaining marauders moved forward and used ranged attacks on the two doom reavers, killing one and setting the other on fire. Kharybdis flailed ineffectively at the doom reavers around it. The three smog belchers engaged by the jack attacked it, but didn't do much damage. The other two took shots at the war dog, with one landing the shot. This failed to kill the war dog, but caught both the dog and Zerkova in the AOE, preventing them from charging or running for a round. Venethrax stood next to the objective and popped feat, catching all three warjacks. The turn ended with no scoring and 27 minutes on my clock.

Bottom 3: Zerkova upkept watcher. The forge seer killed the blood gorger engaging the koldun lord, who moved over and sprayed over four blood gorgers, killing two of them. The destroyer shot a bloodgorger killing it, the scavenger and another bloodgorger with the blast damage. The juggernaut charged Morland from the Devil's Shadow and killed him. The doomreavers did some damage to Kharybdis, but he remained alive. They also managed a charge on a smog belcher and killed it. Fenris finished off Kharybdis, but somehow failed to kill the misery cage. The ternion on the left moved forward and sprayed, but also failed to kill the misery cage. Zerkova moved forward and took a shot, but also failed to kill it. The mechaniks spread out across the back of the left zone. The jack that was engaging the three smog belchers killed them, leaving only one of the unit alive. The war dog ran to stand next to Zerkova. Due to the immortal misery cage in the left zone, no scoring happened again. John's turn ended with 19 minutes on his clock.
Top 4: At this point I knew I was in a bad place. Venethrax was the only thing I had that could realistically deal with the jacks, so that was the plan. Ragman put up his death field and then Venethrax charged the jack in the middle zone. He cast mortality on it and ended up sitting on only a single focus when he finished his attacks. Axiara charged and killed the jack. Jussika and the last blood gorger charged the forge seer and the jack. Neither died. Gerlack charged in and killed the koldun lord, then beserked into the blood gorger, killing it. The smog belcher moved to the left to take a shot and block charge lanes to Venethrax, but I forgot about counter charge on the dog. The dog promptly killed the smog belcher and then returned. The last two marauders took up positions to try and block the same charge lane, as did the arc node. Mar walked behind the water to try and shoot a doom reaver to resurrect her pals, but failed to hit. The turn ended with me scoring the right zone and my clock at 15 minutes. The score was 1-0.

Bottom 4: John decided he had an assassination angle and went for it. Lamentation prevented Zerkova from trying to cast any spells, which meant I had a sliver of a chance. If my marauders could make a tough check or two they might survive. The jack outside the right zone walked into the zone and failed to kill Gerlack. I forget the exact sequence of activations, but between ternion sprays and Fenris, the arc node, both marauders and my objective were killed, clearing the lane for the jack to get to Venethrax. One focus was not enough to survive the attack. Venethrax died with 9 minutes exactly on John's clock. He scored the left zone and scored for killing my objective, putting the final score at 1-2.

Analysis: I did not feel great about this matchup, but was hoping I had kinda misread it. Venethrax not really being able to cast spells hurts the list. Mortality is important for the list to actually hit with any power and most of his list was immune to spells. Having all my jacks was going to be super important to bringing his down, but I really misplayed their positioning, which allowed John to kill them before they got a chance to go in on his heavies. My biggest mistake was not moving Kharybdis back, as without him I didn't have the presence on the left side to fight off Fenris and the doom reavers. I feel like that was my biggest mistake.
The list is decent, but the lack of pathfinder really hurt me in this game. Navigating both forests and the water feature on my side of the board really hindered the mobility of my army though this game. That said, the only way to fix it is to drop Ragman for Saxon and Ragman's dark shroud spell is needed for the list to hit hard enough to deal with armored targets.
I'm certain there are other issues that I could identify, but I'm at work and probably should be doing work things instead of typing up a battle report. Sorry to cut this short. Next week I'm going to do a wrap up on the July scrum. Thanks for reading!
Comments
Post a Comment